Wednesday, 30 March 2022

Flipgrid: Your lens, your stage, your story

Short videos have become a trend in recent years, whether on video platforms like YouTube, Tikitok, or other social media. Creating videos seems to give people more enthusiasm for life.

This phenomenon is not limited to leisure time. For example, in China, short videos have also become a popular form of interaction in teachingIntroductions at the beginning of the term, reading exercises before class, after-school readings, summaries of learning experiences, and other exciting activities can all be shared in short videos.

In this context, there are several key questions to think aboutπŸ’‘

πŸ“Œ How to ensure the security of the videos

πŸ“Œ How to store and classify the videos

πŸ“Œ How to encourage introverted students to enjoy sharing

And Flipgrid can solve all these problems! Whatever the age of your target group, Flipgrid is a great choice!


Why videos

Children always like to try new things, and innovation stimulates them to learn. Written exercises, although necessary, can easily bore children in a single format. Video recordings would be great for spicing things up!

And sometimes, video recording is easier and quicker, honing children's speaking and expression skills, stimulating their creativity, and protecting their desire to express themselves. Watching others' videos may also inspire them to make friends and learn from each other.

How to start

Teachers create groups and invite students to join them. You can also set different topics, and the videos will be grouped, making them very organised and easy to view.

You can also set up member filters to keep videos and information posted in a safe place.


Perhaps an ice-breaking session could be devised, starting with your introduction.

Or perhaps it's an after-school reading share, inviting students to read aloud a favourite passage or enact a small piece of a favourite story.


πŸ‘€πŸ“· Let's take a look at the shooting video section! The main features are the Options, Effects, and Backdrop sections.

The Options section is the basics. You can upload existing audio or choose whether to turn on the microphone or not.

Mirroring video and recording screens also surprised me, as they seem to be ignored by the usual video apps.

The Effects section is the most fun! 

Various filters, fonts, boards, frames, stickers and backdrops are provided.

Students have the freedom to choose Something fresh every time!


😡Someone might say that such an approach might be a treasure for children who like to be in the camera. What about some kids who may not yet dare to face the camera?

Here's the highlight!πŸ’

Some lovely 'costumes' give even shy children a chance to express themselves! Instead of a dull mask, they change according to their expressions, like the cute coffee and book doctor shown below! Each one is cute and creative!


Students who are uncomfortable with the camera at first can also do well and join in the sharing.

Eventually, with more chances, they might become more confident about putting themselves out there and thus be able to face the camera, too.


Limitations

πŸ’’The first is something I'm a little confused about. I found different features on the Ipad and PC side in terms of taking videos. For example, with the face recognition filters like Little Coffee and Dr. Book, I only found this feature on the iPad side, but not on the PC side, which is an inconvenience to some extent. I am not sure if it is due to my device.


πŸ’’The second point is the video time limit.

The time limit can be set when posting a task, but the maximum is only 10 minutes.

However, I think the average share can be done in less than 10 minutes, and in cases where there are particularly long ones, students can record multiple segments, so there is no actual limit to the length of content.


Finally, here are more detailed instructions for the whole process! Click here to start your attempt. Feel free to share your feelings in the comments.πŸ™‡


Image source: screenshots from Flipgrid (click)
Video source: video by Taniuska Worsham via YouTube (click) 

Tuesday, 29 March 2022

Canva: The final step before becoming a good teacher—becoming a good designer!

Have you ever scratched your head over a handout, fumbled around in Word and PowerPoint, spent a lot of time looking for images, only to end up with unsatisfactory results😣?

Do you want your students to shout "Wow😍" when they get the handout and then look through it with interest?

Some may argue that it's more important to prepare for the contentπŸ˜•.

But have you ever been frustrated by the fact that you've prepared your handouts but they don't go down well with your students due to a lack of layout and decoration😩?

After all, no matter your target group is young learners or mature adults, who wouldn't love a good-looking handout or PPT😁?

ThenWhen you try out Canva, you'll find that you're one step away from being a good teacher with a great design! πŸ’ͺ

Strength

Numerous attractive templates

Templates for everything from PowerPoints to posters to documents to logos to CVs are available in a wide range of sizes and styles.

As a teacher, you can choose any template you need when preparing a lesson and modify the content. You can also create a design on your own. 


Sufficient support with enough freedom

Despite being supported by numerous templates, it's still a haven for your design freedom!

Countless thematic images are provided. Just enter a keyword in the search bar, and you can easily find suitable pictures and illustrations.

You can easily adjust the image position, size, clarity, and other attributes.

There is also a wide choice of fonts, including artistic fonts.

User-friendly operation

Effects that require complex manipulation in Word, PowerPoint, and especially Photoshop can be easily achieved with Canva.

Multi-site operation

Canva has a web and an app for the mobile phone or iPad that synchronises content and allows you to create and use it at any time.


Is that all?😜

No! There's a bigger surprise!


Simultaneous editing function for multiple usersπŸ™†

Click the little plus sign at the top right of the page after logging into your account to share the action page and have multiple people edit at the same time!

It's easy to do, whether in an online classroom, an interactive session with the teacher, a group editing a poster during class, or a presentation of an assignment after class.

For example, the image below shows a brainstorming platform where students can freely edit and express their opinions.


Restrictions

🍏 Many images and templates are available for a fee, but the free parts are actually sufficient for most needs.

🍏 Students may spend some extra time on the design. But it is worth it! The beautiful output will inspire their learning. The sense of achievement created by the display will also help them to work hard on their learning tasks from the heart.


Finally, let's learn more tips and tricks through a video. πŸ™‹If you want to try it, click here and start your design! Feel free to share your feelings in the comments.


Image source: screenshots from Canva (click)
Video source:  video by Natalia Kalinska from YouTube (click)


Conceptboard: Always enjoy collaborative activities!

You might still remember my previous post about WebQuest, a web-based learning approach. The process of students taking on individual roles, working in small groups, and summarising and reporting back together is significant. (For new readers or those who can't remember, click here if you want to review.) 

Collaboration has been increasingly valued in learning and teaching. In China, in particular, the shift from teacher-centred to student-centred classes has seen a significant increase in collaborative tasks, both during and after class. In this context, a multifunctional and efficient tool or platform is vital!

Today we will introduce an online collaboration tool for completing learning tasks—ConceptboardπŸ’

With it, the days of running around with multiple devices and switching between chat apps and editing software will be over!


Its features can be seen at a glance in the picture below. Let's see it step by step!πŸ’–


⛳ The first step is to create a brand new board.

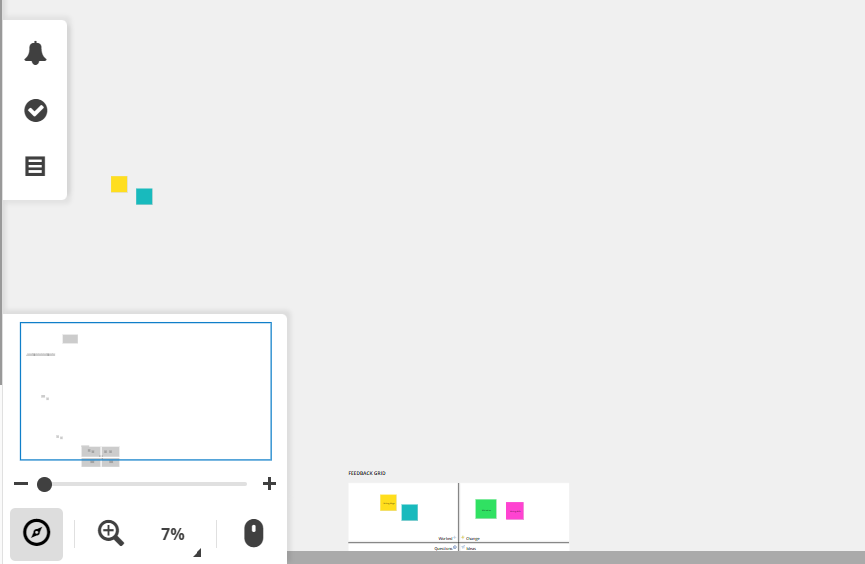
The board page consists of a top toolbar, a function bar, a chat window in the bottom right-hand corner, and a small window in the bottom left-hand corner.

There are eight main sections in the left sidebar.


Upload files

Inserting documents into the working panel eliminates the need for tedious switching and notes.

Insert sections

Insert sections of various sizes to keep the page organised.

Insert building blocks

There are many flowchart templates here that are useful for organising ideas, summarising key points, and reporting on presentations.


Insert templates

A wide range of templates are provided for various activities that require collaboration or can be done independently.

As an example, the image below shows a feedback grid template where students can write down their gains and progress and ask more questions and ideas about how they can make more progress and learn better.


Insert Icon

Lovely and minimalistic icon markers are provided.


Insert widgets

Voting is available in the standard version.

You can upload images, text, or the iconsas options on the poll page.

It has the option of being set to single or multiple choice. Once the members have finished, the system will automatically tally the results. 


Embedded audio or video


Inserting videos is also easy. There is no more need to switch pages.


Get screenshot extension


This is a plug-in for taking screenshots, depending on your needs. For me, the screenshot function of my computer is sufficient.


Strengths

πŸŒ€ The pages can be zoomed in and out infinitely, and the scale can be freely controlled.

πŸŒ€ At the same time, there is a small window at the bottom left of the page that gives you an overview and allows you to find the inserted board easily.

πŸŒ€ Multi-functional to meet multiple needs

πŸŒ€ Users can invite each other by scanning a QR code or registering an email address.

πŸŒ€ Once you have joined a team, you can edit your work pages simultaneously.

πŸŒ€ Also, there is a chat box at the bottom right so that group members can chat and complete editing tasks simultaneously. You can share ideas and move the process forward without switching between chat apps.


πŸŒ€ Multiple groups can also be created in the board folder, perfect for sorting.


Limitations

πŸ‘Ύ The biggest limitation is that some features still require payment, but as I have highlighted in other posts, the free version is sufficient for most needs.

πŸ‘Ύ The second point concerns the problems I have encountered in using it. For example, it is not possible to cancel a document during the upload process, and if it is a document with many pages, you have to wait until it is all uploaded. This can sometimes be a waste of time. Also, I can't seem to drag or delete videos after inserting them, but I'm not sure if this is a problem with my operation or my device.

πŸ‘Ύ Students may have difficulty or lack autonomy in completing group activities on their own. A good solution to this is to include the teacher in the group. The teacher does not need to intervene too much but can supervise the process and give guidance when needed.


πŸ‘»In fact, the first time I used it, it took me a long time to invite members to create a group, for which I found this video with specific instructions on inviting members.

If you want to try it out, click here. Feel free to share your feelings in the comments.😜


Image source: screenshots from Conceptboard (click)
Video source: video by Conceptboard via YouTube (click)